Pei-Chi & Rodney | Nov 20, 2025

How to Make a Wabi Kusa Ball

If you're looking for a fun weekend project, a Wabi Kusa Ball is a great way to display aquatic plants in a unique and natural way.


Originally inspired by Japanese aquascaping, Wabi Kusa combines aquatic plants with an exposed moss-covered soil ball, creating a beautiful living display that can be enjoyed both in and out of the aquarium.


They're simple to make and can be customised with almost any aquatic plants you have on hand.

What You'll Need

*Aquasoil

*Sphagnum moss

*Aquarium moss (such as Java Moss)

*Assorted aquatic plant cuttings

*Polyester thread

*Fine fishing line

*Tweezers

*Water

Plant Choices

Some great choices include:

-Anubias sp

-Hygrophila sp

-Rotala sp

-Ludwigia sp

-Cryptocoryne (small varieties)


Mix different colours, leaf shapes and textures to create your own unique design.

Method

Step 1 – Make the Soil Ball

Wet the aquasoil with some water and crumple with your hand until the mixture forms a firm, mouldable mud.


Roll the aqua soil mixture into a ball. The size is entirely up to you, but a tennis ball-sized Wabi Kusa is a good starting point.


The ball should hold its shape without becoming sloppy or falling apart.


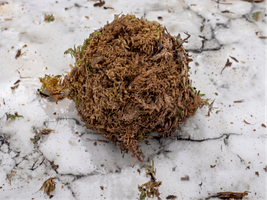
Step 2 – Wrap with Sphagnum Moss

Cover the entire soil ball with a layer of damp sphagnum moss.


Once covered, wrap the moss securely using polyester thread. This helps hold the aquasoil ball together so it does not fall apart when placed inside the aquarium.


Don't worry if it doesn't look perfect—nature rarely is!


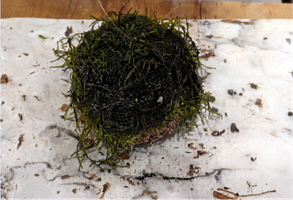
Step 3 – Add Aquarium Moss

Cover the top and sides of the ball with your chosen aquarium moss, such as Java Moss.


Secure the moss using fine fishing line, wrapping it gently around the ball until everything is held firmly in place.


Over time, the moss will grow and hide the fishing line completely.


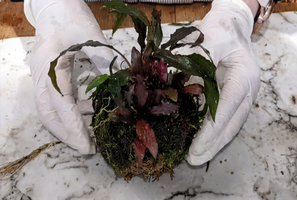
Step 4 – Plant Your Aquatic Plants

Using a pair of tweezers, gently poke small holes into the moss-covered ball.


Insert cuttings of your favourite aquatic plants into the holes.

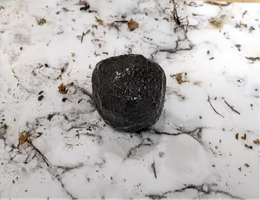
Step 1: make an aquasoil ball

Step 2: cover with sphangnum moss

Step 3: attach aquarium moss

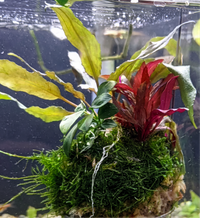
Step 4: add aquarium plants

Enjoy Your Wabi Kusa

Once planted, your Wabi Kusa is ready to display.


You can:

*Place it directly on the substrate in your aquarium.

*Sit it on hardscape as a natural feature.

*Display it in a shallow glass container with a small amount of water.


Mist it regularly and grow it emersed in a humid environment.

As the plants grow, they'll gradually root into the ball and create a lush, living arrangement.


💡 Bonus Tip

Want to make your Wabi Kusa really stand out?


Try hanging it inside your aquarium using one of the Chihiros Wabi-Kusa Hangers. Suspending the ball creates a striking floating garden effect and allows the plants to become a real focal point of the aquarium.

Let's Create Thriving Aquariums—Together

Pei-Chi & Rodney

More Posts

<p>Potassium Permanganate Baths – How We Use Them</p><p>Potassium Permanganate Baths – How We Use Them</p>

Potassium Permanganate Baths – How We Use Them

Potassium permanganate (PP) has been used in the aquarium hobby for decades as an external treatment for parasites, bacteria and fungi. It is a valuable treatment when used correctly, but it is not something to use casually. Good preparation, accurate dosing, excellent water quality and constant observation are all essential for safe treatment


The method below is simply how we use PP at Fintastic Studio. It is not the only method available, nor is it intended to replace veterinary advice. Always research thoroughly before using PP and never leave fish unattended during treatment.


*Potassium permanganate can be purchased from King's plant barn under - Wallys Potassium Permanganate.
<p>Vinegar Eel Culture Instruction</p><p>Vinegar Eel Culture Instruction</p>

Vinegar Eel Culture Instruction

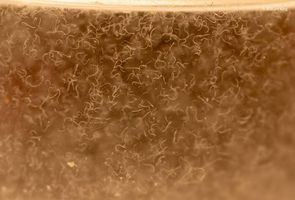
Vinegar eels are one of the easiest live foods to culture and are an excellent first food for small fish fry. They remain alive in freshwater for many hours, giving fry plenty of time to feed.

There are two different methods you can use to culture them. The traditional method is very reliable and requires minimal maintenance, while the High Density Vinegar Eel (HDVE) method produces much larger quantities but requires a little more care.

Daphnia Culture InstructionDaphnia Culture Instruction
Daphnia Culture Instruction

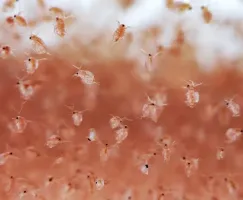
Daphnia are small freshwater crustaceans that make an excellent live food for aquarium fish. They are highly nutritious and are especially useful for conditioning breeding fish and feeding growing fry.

There are many different methods for culturing daphnia. The following is the method that has given us the most consistent results after plenty of trial and error.

Microworm Culture InstructionMicroworm Culture Instruction
Microworm Culture Instruction

Microworms are an excellent first food for newly hatched fish fry. They are easy to culture at home and, with a little care, will provide a continuous supply of live food.

White Worm Culture InstructionWhite Worm Culture Instruction
White Worm Culture Instruction

White worms (Enchytraeus albidus) are one of the best live foods available for aquarium fish. Rich in protein and highly nutritious, they're excellent for conditioning breeding fish, promoting growth, and encouraging even fussy fish to feed.


Once established, a white worm culture is easy to maintain and can provide a continuous supply of live food for years.

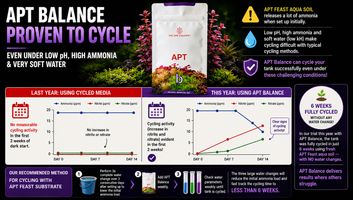
Cycling Aquasoil Based Aquarium Using APT Balance – Our Trial ResultsCycling Aquasoil Based Aquarium Using APT Balance – Our Trial Results
Cycling Aquasoil Based Aquarium Using APT Balance – Our Trial Results

One of the characteristics of fresh APT Feast Aquasoil is that it releases a significant amount of ammonia when first submerged. In our test setup, 15 litres of APT Feast in a 125-litre aquarium produced an ammonia reading of around 20 ppm.


The combination of high ammonia, acidic water and very low carbonate hardness (kH) can make establishing the nitrogen cycle more challenging than in a typical aquarium. Beneficial nitrifying bacteria generally perform best in water with a higher pH and adequate carbonate hardness, so we wanted to see how APT Balance would perform under these conditions.

How to Safely Perform Water Changes with Tiny FryHow to Safely Perform Water Changes with Tiny Fry
How to Safely Perform Water Changes with Tiny Fry

Anyone who has raised fish fry knows the feeling—you need to do a water change, but the fry are so tiny you're worried they'll end up disappearing down the siphon.


Fortunately, there's a simple solution that uses inexpensive equipment you probably already have. By using an airline as your siphon, you can perform slow, controlled water changes without putting your fry at risk.


As a bonus, the same setup also works perfectly for drip acclimating sensitive fish and shrimp (if we ever get them in NZ).

Which Dechlorinator Should You Choose? Which Dechlorinator Should You Choose?
Which Dechlorinator Should You Choose?

If you use tap water for your aquarium, a good dechlorinator is one of the most important products you'll ever buy. Every water change introduces chlorine or chloramine, and failing to remove them can quickly harm the beneficial bacteria in your filter as well as your fish.


One of the questions we get asked most at Fintastic Studio is:

"Which dechlorinator is the best?"


The answer is... it depends on your aquarium and your needs.

Fintastic Studio Beef Heart RecipeFintastic Studio Beef Heart Recipe
Fintastic Studio Beef Heart Recipe

Our homemade beef heart mix has been a staple food for growing discus and other carnivorous tropical fish. This recipe combines lean beef heart with quality fish foods and nutritional supplements to produce a highly palatable, protein-rich food that freezes well and is easy to portion.